Getting Started
Contact Lists, Segments, and Imports
Segments
How to Create Segments
How to Exclude a Subset of Contacts While Using Multiple Filters
What is the "Subscribers Who Have Open Tracking Disabled" Segment?
What are Segments?
How to Merge Multiple Genre Segments
Contact Lists
Imports
Email Campaigns
Email Campaign Tips and Tricks
How to Track Subscribers Who Clicked a Specific Link
How HSTS Can Break Links in Hive
How to Use Both AND and OR Conditions When Targeting Users
How to Set Default Merge Tag Values
Why Emails Show Different in Some Clients
How to Include a PDF in Your Template
How to Add a GIF to Your Template
How Open Rates Are Calculated
How to Add "View Email in Browser" URL to Template
Creating Templates
Features for Events
Features for eCommerce
How Does the Abandoned Orders Block Work?
How to Use the Shopify Product Details Block
How to Add a Discount Code to Your Emails
How Does the Recommended Product Block Work?
How to Copy a Template to Another Brand
The Guide to Merge Tags
Email Preview Text
Best Sizes for Backgrounds, Images, and Banners
How to Use the Content Block
How to Create an A/B Test Campaign
Email Deliverability
SMS Campaigns
Events
Automations
How to Setup an SMS Automation
How to Create a Winback Automation
How to Create a Thank You Automation
How to Customize a Pre-Built Welcome Automation
How to Customize the Pre-Built Winback Automation
How to Use Splits in Automations
Pre/Post Event Reminder Setup
How to Use Hive's Prebuilt Automations
How to Setup a Keyword SMS Auto Response Automation
How to Add Users to a Segment From an Email Automation
Can Subscribers Opt-In By Texting My Hive Phone Number?
How to Create a Welcome Automation
How to Create a Browse Abandonment Automation
Signup Forms, Contests, and Capture Apps
Integrations
How to Integrate Magento with Hive
How to Integrate Zapier With Hive
Integrate Squarespace with Hive
Integrating Hive With Google Forms
Using the Eventbrite Integration
Using Hive's Smile.io Integration
How to Integrate With Shortstack in Hive
Integrating Privy With Hive
How to Connect Big Commerce
How to Find Your Facebook Pixel
Reporting
- All Categories
- Signup Forms, Contests, and Capture Apps
- Signup/Popup Forms
- How to Create a Popup Form
How to Create a Popup Form

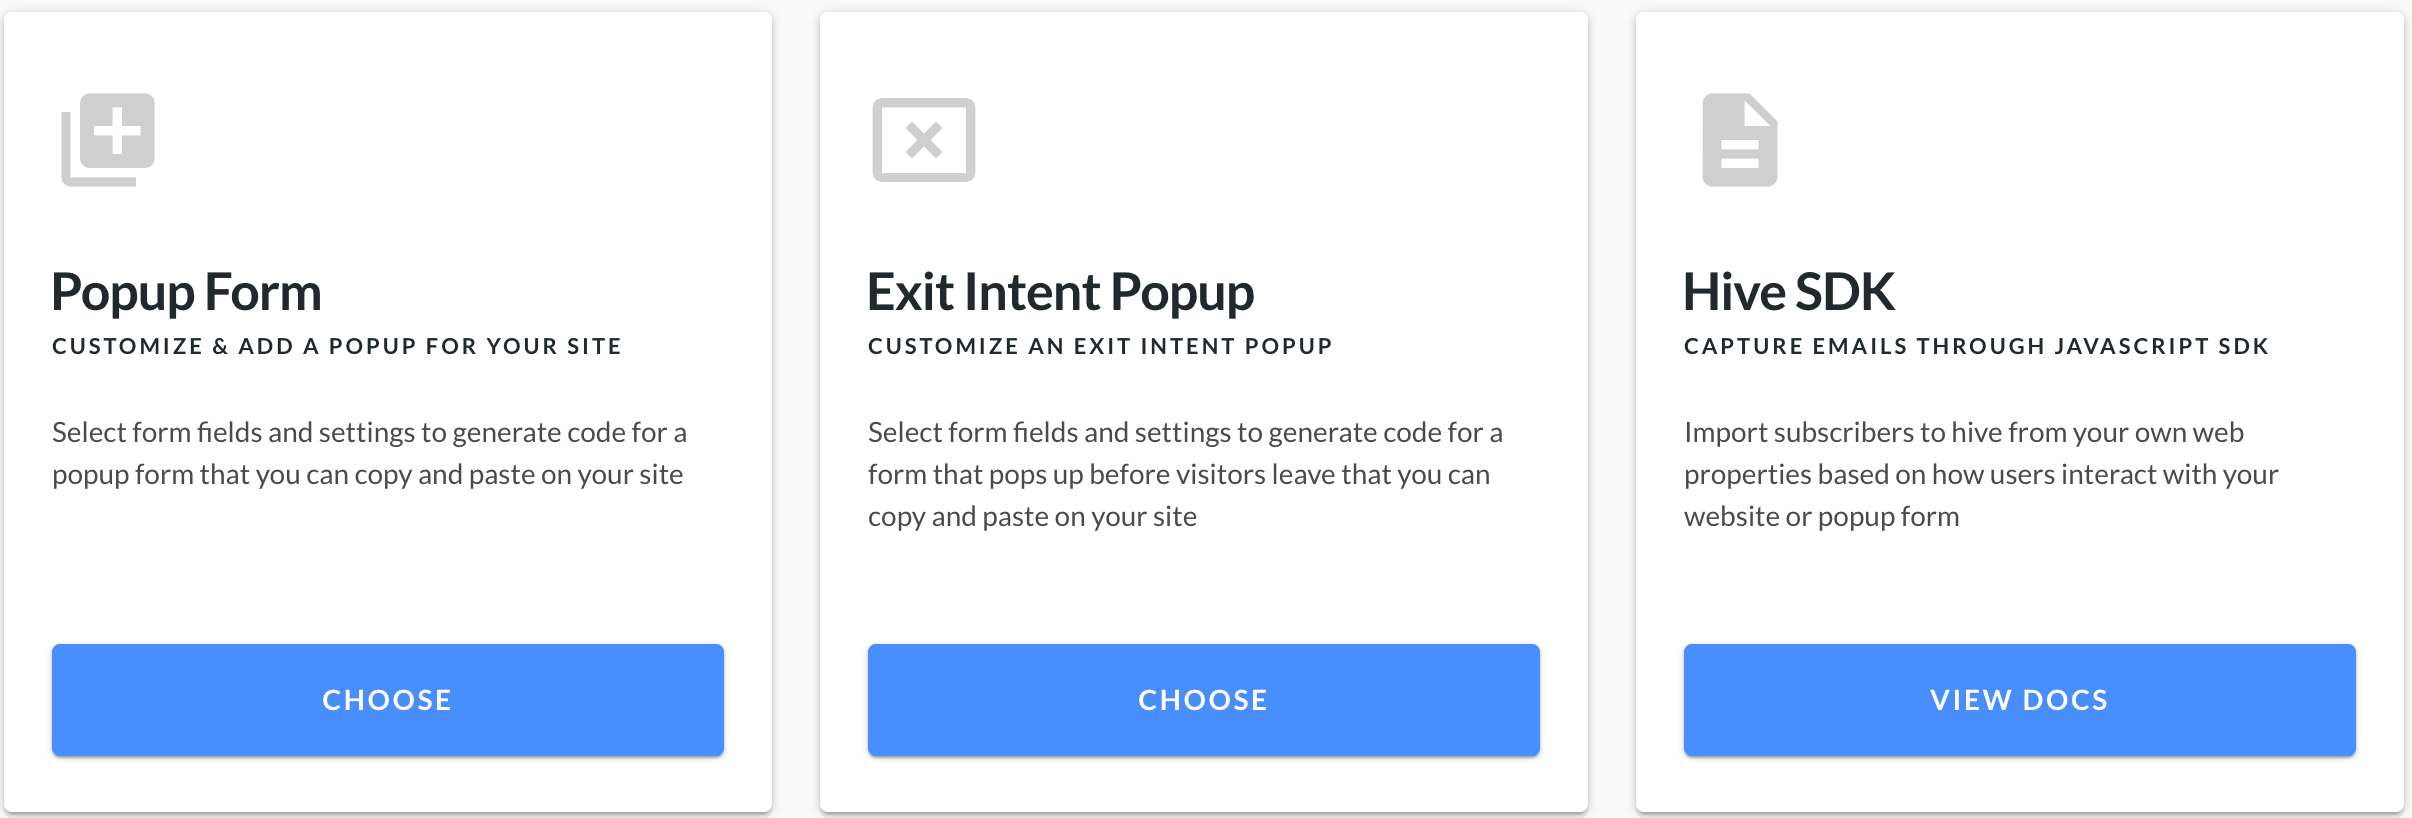
Creating a Popup Form
- Click Popup Forms in the left sidebar of your Hive dashboard > Click the + New Popup Form button in the top right corner > Click the Choose button under Popup Form
- Under Popup Form Details, type in the name of your popup form that'll show internally in Hive.
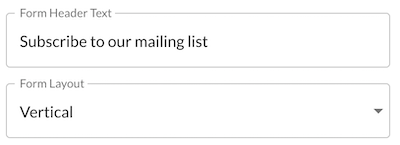
- Customize the form settings by choosing the Header Text, Form Layout, and Button Label.
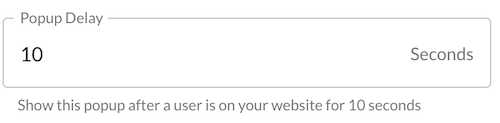
- Customize the Popup Delay. This is how long a customer needs to be on your webpage before the popup appears.
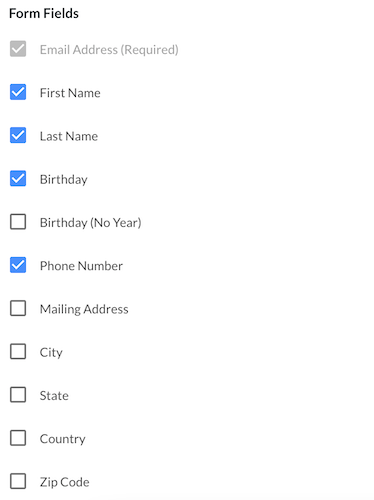
- Under Form Fields, choose which information you want to collect on your popup form by selecting the relevant check boxes.
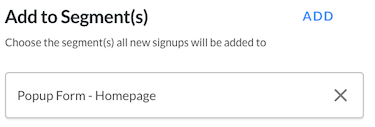
- Under Add to Segment(s), choose what segment(s) you want these signups to sync into by clicking Add. This will not appear on your form but will show up on your segments page as a new segment (if new) or be added to an existing one (if pre-existing).
- Under Opt-in Segments, you have the option to customize the interest/preference segments your customers opt-in to by clicking Add. Click X to delete the default segments.
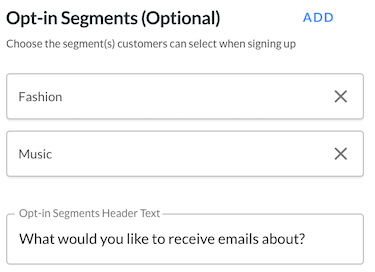
These appear on your form as checkboxes. When new signups check the boxes, they’ll be added to the corresponding segments in your Hive account.
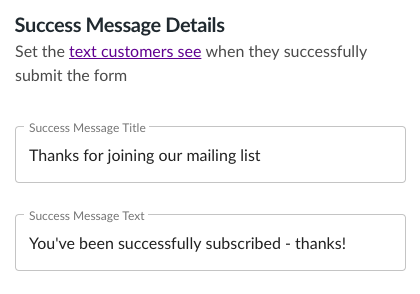
- Under Success Message Details, set the success message that appears when customers successfully signup for your popup form.
- You can preview the popup form or the success message by toggling the switch.

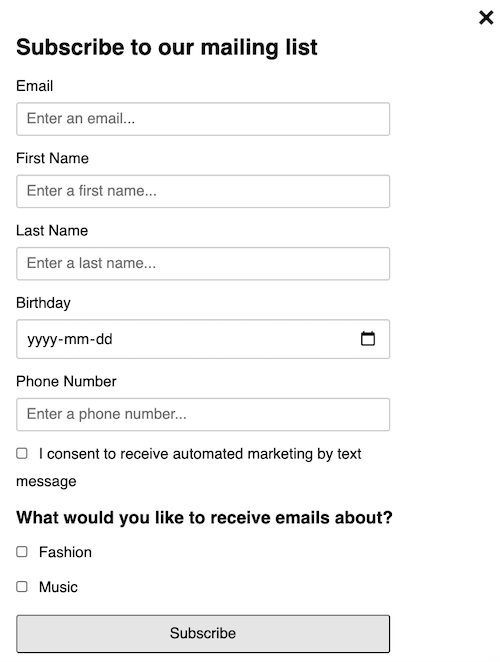
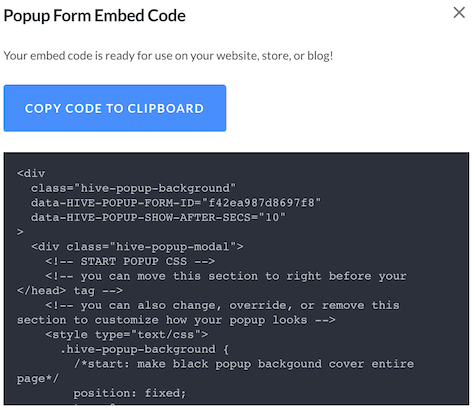
- Once you’ve customized your form, click Save & Get Embed Code in the top right corner. This generates the HTML code for you to copy and paste into your site.