How to Create a Thank You Automation

Create New Customer Thank You Email Template
- Click Templates in the left sidebar
- Hover over any of the templates and click the Actions button > Edit Copy of Template or + New Email Template in the top right to design your own
- Choose In Email Automations > Completed Order
- Style your template
Set Up a New Customer Thank You Email Automation for Shopify
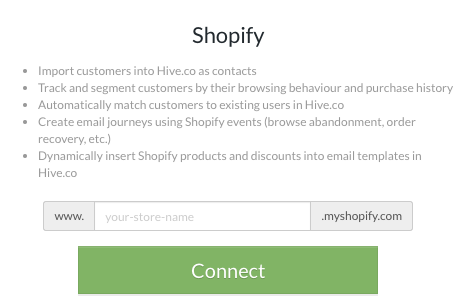
- Connect Your Shopify Store
- Click Settings in the bottom left corner > Connect Data Sources
- Type your store name in the Shopify field and click Connect
Create Your Email Automation
- Click Email Automations in the left sidebar > + New Email Automation
- Enter a title for your automation e.g. New Customer Thank You and click Continue
- Click Entry Trigger > E-commerce > Completed Order > Completes Their First Order
- Click Global Rules to add any additional parameters. If there are no additional parameters to add, click Continue
- Click the circle with the + > Time Delay to set the time between when they complete their first order and when they receive this email. Click Save Time Delay.
- Click the circle with the + > Email to set your subject line, preview text, "From" Name, and email address, and choose your template. Click Save Email.
- Add additional steps by clicking the circle with the + or click Save Automation to create a one-step automation
- Click the toggle in the top right beside Paused to set your automation live
You're finished! Your customers will receive an email or series of emails from you after they make their first purchase.
Set Up a New Customer Thank You Email Automation for Eventbrite
- Connect Eventbrite
- Click Settings in the bottom left corner > Connect Data Sources.
- Click Connect under Eventbrite

Create Your Email Automation
- Click Email Automations in the left sidebar > + New Email Automation
- Enter a title for your automation e.g. New Customer Thank You and click Continue
- Click Entry Trigger > Events > Completed Ticketing Order > Completes Their First Order
- Click Global Rules > View All Rules > Event Data > New Ticketing Customer. Then click Save Rule.
- Click the circle with the + > Time Delay to set the time between when they complete their first order and when they receive this email. Click Save Time Delay.
- Click the circle with the + > Email to set your subject line, preview text, "From" Name, and email address, and choose your template. Click Save Email.
- Add additional steps by clicking the circle with the + or click Save Automation to create a one-step automation
- Click the toggle in the top right beside Paused to set your automation live
You're finished! Your customers will receive an email or series of emails from you after they make their first purchase.