How to Create a Winback Automation

Design your Winback Email Templates
- Click Templates in the left sidebar
- Choose any of the Featured Templates
- Hover over any of the templates and click the Actions button > Edit Copy of Template or + New Email Template in the top right to design your own
- Create one or more templates, depending on how many steps you want your winback series to include
For Subscribers Who Haven't Engaged With 10 Emails
Set Up a Winback Series Email Automation
- Click Email Automations in the left sidebar, click + New Email Automation
- Choose a title for your automation (e.g. Winback Series)
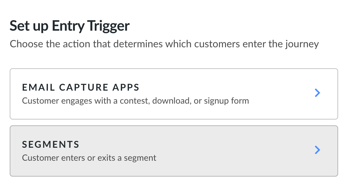
- Click Entry Trigger to choose how a subscriber enters this automation
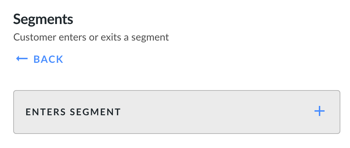
- Click Segments
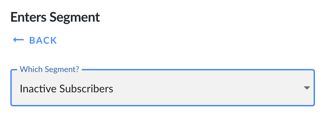
- Select Enters Segment
- Select Inactive Subscribers (haven't engaged with 10+ emails) and click Save Trigger
- Click the checkmark to add additional optional Global Rules - how subscribers will enter and continue in the automation
- Then click the + and either Time Delay or Email
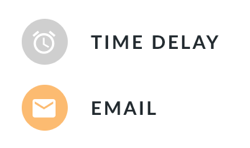
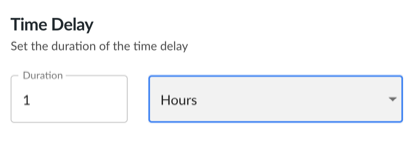
- Under Time Delay, you'll be able to set the duration of the delay in minutes, hours, or days and Save Time Delay
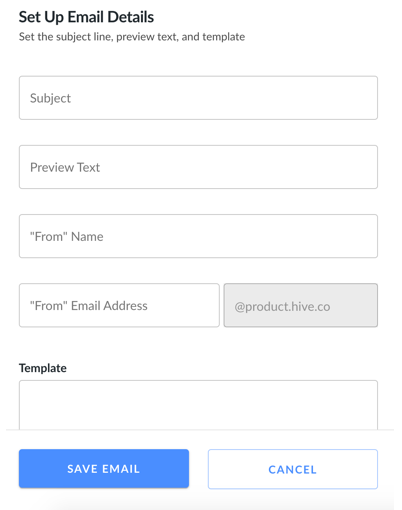
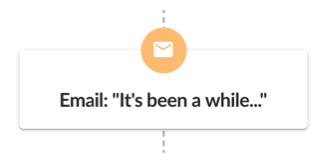
- Under Email, you can choose your template, subject line, preview text, "From" Name, and "From" Email Address. Click Save Email in the bottom left to save any updates.
- Add additional steps by clicking the + (like follow-ups after 1 week and 2 weeks) or click Save Email Automation to create a one-step automation

- Click the toggle in the top right beside Paused to set your automation live
You're finished! Your subscribers will receive an email or series of emails from you when they haven't opened or clicked on 10 of your emails.
For Shopify Customers Who Haven't Purchased in a While
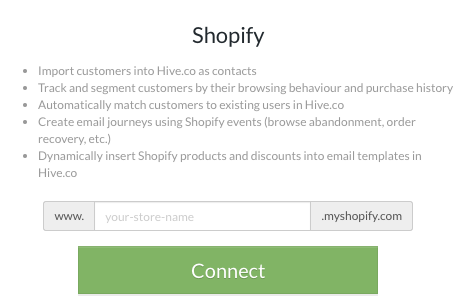
Connect Your Shopify Store
To create a Winback email automation with Hive, first connect your Shopify store.
- Click Settings in the bottom left corner, click Connect Data Sources
- Type in Your Store Name in the field and click Connect
Set Up a Winback Series Email Automation
- Click Email Automations in the left sidebar, click + New Email Automation
- Click Customer Winback (this automatically creates a two-step customer winback email automation that you can customize)
- Click the checkmark to add additional optional Global Rules - how subscribers will enter and continue in the automation
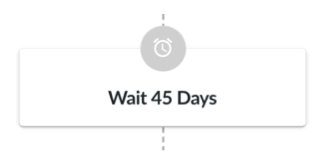
- Then click the clock icon to customize the delays before each email sends (e.g. 45 days after their last purchase)
- Click Email to choose your template, subject line, preview text, "From" Name, and "From" Email Address for each email. Click Save Email in the bottom left to save any updates.
- Add additional steps by clicking the + (like follow-ups after 1 week and 2 weeks) or click Save Email Automation to create a one-step automation
- Click the toggle in the top right beside Paused to set your automation live
You're finished! Your subscribers will receive an email or series of emails from you when they haven't purchased from you after a number of days.